Saturday, June 30, 2012

Two for One

Two more FOs today, one of which you've never even seen!

First off, here's the "real" maxi dress:


I've mentioned that this fabric is pretty thin; if you look, you can see that I'm wearing a full slip underneath for modesty's sake.  I'm still not sure what to do about the bra strap situation with this dress.  When I wore my blue one, I did wear a racer-back bra which didn't show in the back, but was visible at the front neck.  Here I'm wearing a plain old bra, which isn't visible at the front but can be seen, along with the slip's straps, at the back.  I know people do this all the time and it's not too shocking, but it kind of bugs me!

Interestingly, I had a hard time figuring out how to accessorize this dress.  In the end, I went with bronze metallic sandals, gold earrings and necklace, a bronze beaded bracelet I made years ago, and this olive green shrug I knit years ago.  I really like this shrug:  I made this pattern 3 times!  This one is pre-Ravelry, but here's a link for a brown one I made.  And here's a picture of my bracelet, which I don't wear nearly enough:


And here's FO #2:  I finished my Adrift cardigan a couple weeks ago.  Since I've made this one before, and since this is supposed to be my "winter" version, it felt kind of anti-climatic.  I just took one picture of it yesterday, so you can see how gorgeous the color is, but if you want to see many different ways in which it can be worn, see this post.


And last but not least, today is the last day of my Seamless Pledge.  I haven't written about it since I made the commitment on Jan. 1 to refrain for 6 months from buying any new clothing or shoes, because it's pretty much been a non-event!  I wasn't sure I could do it, clothes horse that I am, but I was able to complete the six months relatively painlessly!  So as of today, I'm committing to another 6 months of Seamlessness, to make it a full year!

Friday, June 29, 2012

Today

I'm heading to the grocery store, wearing my new t-shirt!


Not much else to say really, since I just wrote about this one yesterday!  It is a little long in the waist, but I prefer my shirts to be that way, so that the lower dorsal area doesn't get exposed when I sit down.  You know what I'm talking about.

Also painted my nails last night with one of my new China Glaze polishes, just to go with this top!


A very pretty blue-grey.  Formula was perfect on this one!  I've used four of the twelve colors so far, but this is the first one I've taken time to photograph!

I spent quite a while this morning photographing my four new makes, so I'll be doling those out over the next few days!

Thursday, June 28, 2012

Succeeding in spite of myself.

I made my second Renfrew top today, and boy, was it a bear.  But it came out OK in the end.

I used this very cute fabric I ordered from GirlCharlee.com (Thanks, Lisa!), a cotton/rayon jersey.


Nice and soft, with lots of drape.  My main problem was that after washing, the grainline was very skewed.  I again spent a ton of time trying to straighten it out, but finally decided to just let it be off grain.  I figure, most of the tee shirts I've purchased (I won't say from where) are off grain too, so how bad could it be?  Well, it could be very bad - one of the reasons I wanted to make my own is that I get really sick of the tees twisting around my body because they weren't cut straight.  But I now have a little more empathy with the folks who sew up our RTW items.  You can bet I'll be researching how to true up grain on knits, but if anyone has thoughts on this, chime right in!

The tee came out looking good in the end; we'll see how it fares after washing.  I did it the same way I did my first one, completely on the serger and sans topstitching around the bindings.  To me the topstitching really gives a  tee a sporty look, and this fabric doesn't scream "sporty."  Rather, it whispers, "cute."


I spread it out on the bed because if I'd tried to hang it up, it would just collapse on itself!  That's how silky it is!  Feels great next to the skin.

I know I owe you guys a bunch of modeled pictures of stuff I've finished lately!  I've been spending a fair amount of time trying to finish up my spring cleaning before my niece comes for the rest of the summer, and once I'm in my grubbies, I just can't seem to find the energy to clean myself up and take pictures!

Wednesday, June 27, 2012

An embarrassment of riches.

I've been feeling a bit "meh" about most of my knitting lately.  And I think a lot of it has to do with the sheer volume of sweaters sitting around here, many of which I've never worn, or have only worn once.  Here's an example:


I made this top back in May of 2008.  Today is the first time I've worn it.

As I was knitting it, I was sure that this was going to be my best project ever; that it would go with so many things; that it would make me feel like a million bucks.  And as soon as I finished it, I set it aside and moved on to the next thing.

This is usually the way it goes with me and knitting.  I think I have to finally admit that I'm a process knitter.  And yet, if it's not something for me, a knitting project usually holds little interest.

I'm a fast knitter; I tend to complete 12 - 15 sweaters per year.  Multiply that by the many, many years I've been knitting, and you can imagine that storage has become an issue.  I've recently been trying to weed things out a little, but I'm not finding too many things I'm willing to part with.

How do you guys handle storage?  Do you regularly let go of sweaters you're not wearing?  Do actually wear the things you knit?

Tuesday, June 26, 2012

Knit Adventures, part 3: The Real One

So I think I may have mentioned that the first maxi dress (blue) and the second one (green) were both trial runs for the "real" one I wanted to make.  Before I get on to the good stuff, let me show you Sunday's fail:


This is the experiment I did with the kelly green interlock knit, attaching the neck and sleeve binding in the same way they're applied in the Renfrew top*, using my serger.  You can see that didn't work - I ended up with a wavy mess. 

I've come to a couple of conclusions:  1) interlock is a pain to work with and 2) it's just way too heavy for a maxi dress anyway - or any summer dress I think.

For the "real" dress, I had a nice, drapey rayon jersey print in my new favorite color, coral:


Isn't that pretty?  It came in my big knit order from Fabric.com.  I looked yesterday to see if there was more, but no such luck.  I really love this medallion print.  Unfortunately, it wasn't printed in line with the grain of the fabric.  I was able to get the front almost straight, but the back is slanted, and I'm OK with that.


I was worried that this fabric was going to be too thin, but as has been my experience with knits so far, it plumped up after a run through the washer and dryer**.  It is quite drapey and stretchy, which made laying it out to cut very tedious and time-consuming, especially once I figured out the print wasn't straight.  I probably spent an hour just on that step.

I also spent a lot of time doing samples of different stitches and binding applications, but no matter what I did, I just couldn't get the topstitching to work for me.  So I hand-stitched it to the reverse like I did the first time - for this dress, the finished product was more important to me than trying out new techniques. 


I will say that for my samples, I did cut armhole-shaped pieces of scrap to apply my fake bindings to.  I've started to think that part of my difficulty is that is some sections, you're sewing vertical grain to horizontal grain.  Even in hand-knits, this can be a challenge.

Also, this time I finished the side of the binding that was going to be turned to the inside with my serger, and that made the hand-stitching a lot easier:  the overlock stitch worked as a stabilizer and sort of "gathered" the fabric into a curve.  I did all seams on the serger as well.

I'm pretty happy with this dress, although it's a lot more body-conscious (and therefore revealing) than the first one because of the nature of the fabric.  But this thinner jersey gives a much better result.  I will admit that I'll be wearing a slip under it to smooth things out.

I don't have time for a photo-shoot today because I've got appointments throughout the afternoon with different contractors.  But I was excited to share this version of the Mission Maxi.  Frankly, now that I've finished this one, I'm not sure I'll be wearing the blue one!  (And there's no way I'll be wearing the green one!  Well, maybe for lounging around the house - it is pretty comfy.)


I have a little too much on my plate at the moment, but once things settle down a bit, I'm planning on compiling all the fantastic tips you guys left me in the comments and trying them out.  Thanks again to all of you!


* I measured the neckline and armscyes, then took off 1/2" from the armhole bindings and 1" from the neck, sewed them closed and then folded them in half and sewed the raw edges to the armhole and neck edges.

** Conversely, the interlocks seemed just about right before I washed them, but then got too puffy!

Sunday, June 24, 2012

Miranda

Remember when I told you about working with Evelyn to edit her new knitting patterns?  Well, for the last week or so, we've been working on a new hat pattern, which went live as a free Ravelry download on Friday.  And in conjunction with its release, Evelyn started a charity knit-along, complete with its own Ravelry group

After I joined, I invited some of you who are my friends on Ravelry to knit along with us.  If I didn't invite you, it's because after I did several invites I got bored and lazy, and decided just to send out a general invite via the blog!  Yes, I'm a little ashamed of myself!

This morning I started my first Miranda hat for the KAL.  I've been really excited about this because believe it or not, this is my first charity knitting experience.  I have to admit I'm a very selfish knitter and sewer - most of the time, if it's not for me, I just get bored with a project!  But this group is full of people I know via their blogs and Ravelry, and it's fun for me to do a project like this along with a great community of knitters.

So here are the beginnings of my hat:


I'm using some Valley Yarns Northampton in the Claret Heather colorway, which I had left over from Hubby's Very Warm Hat.  This yarn is 100% wool, so it will be nice and toasty, but for future hats I'd like to use superwash or blends, so that the hats will be machine-washable.

If you'd like to join in with us, check us out at the links above, or read about the KAL on Evelyn's blog here.

Oh, and did I mention there are going to be prizes?!  There will be a drawing at the end of July, August and September for one prize each month.  July's prize is going to be a Box Bag which I will be making.  Prizes for August and September to be announced.  At the end of the KAL, a grand prize (also to be determined) will be awarded to the knitter who donates the most hats.  So get out those needles, folks!

Saturday, June 23, 2012

Knit Adventures, part 2

For my second go-round sewing knits, I made a maxi dress.

Yes, you read that right.  A maxi dress.

I was hesitant for a quite a while to go down this road because 1) I'm short, 2) I'm not super slender and 3) I'm on the old side for this look.  But my BFF talked me into it; she thinks it's OK, and she's shorter and older than me!

And the maxi does have its benefits:  you don't have to shave your legs.

So on Thursday I made the dress, and let me tell you, for a garment with only 3 pattern pieces and 7 seams, it sure did give me a lot of trouble.  But I'm pretty happy with the outcome:


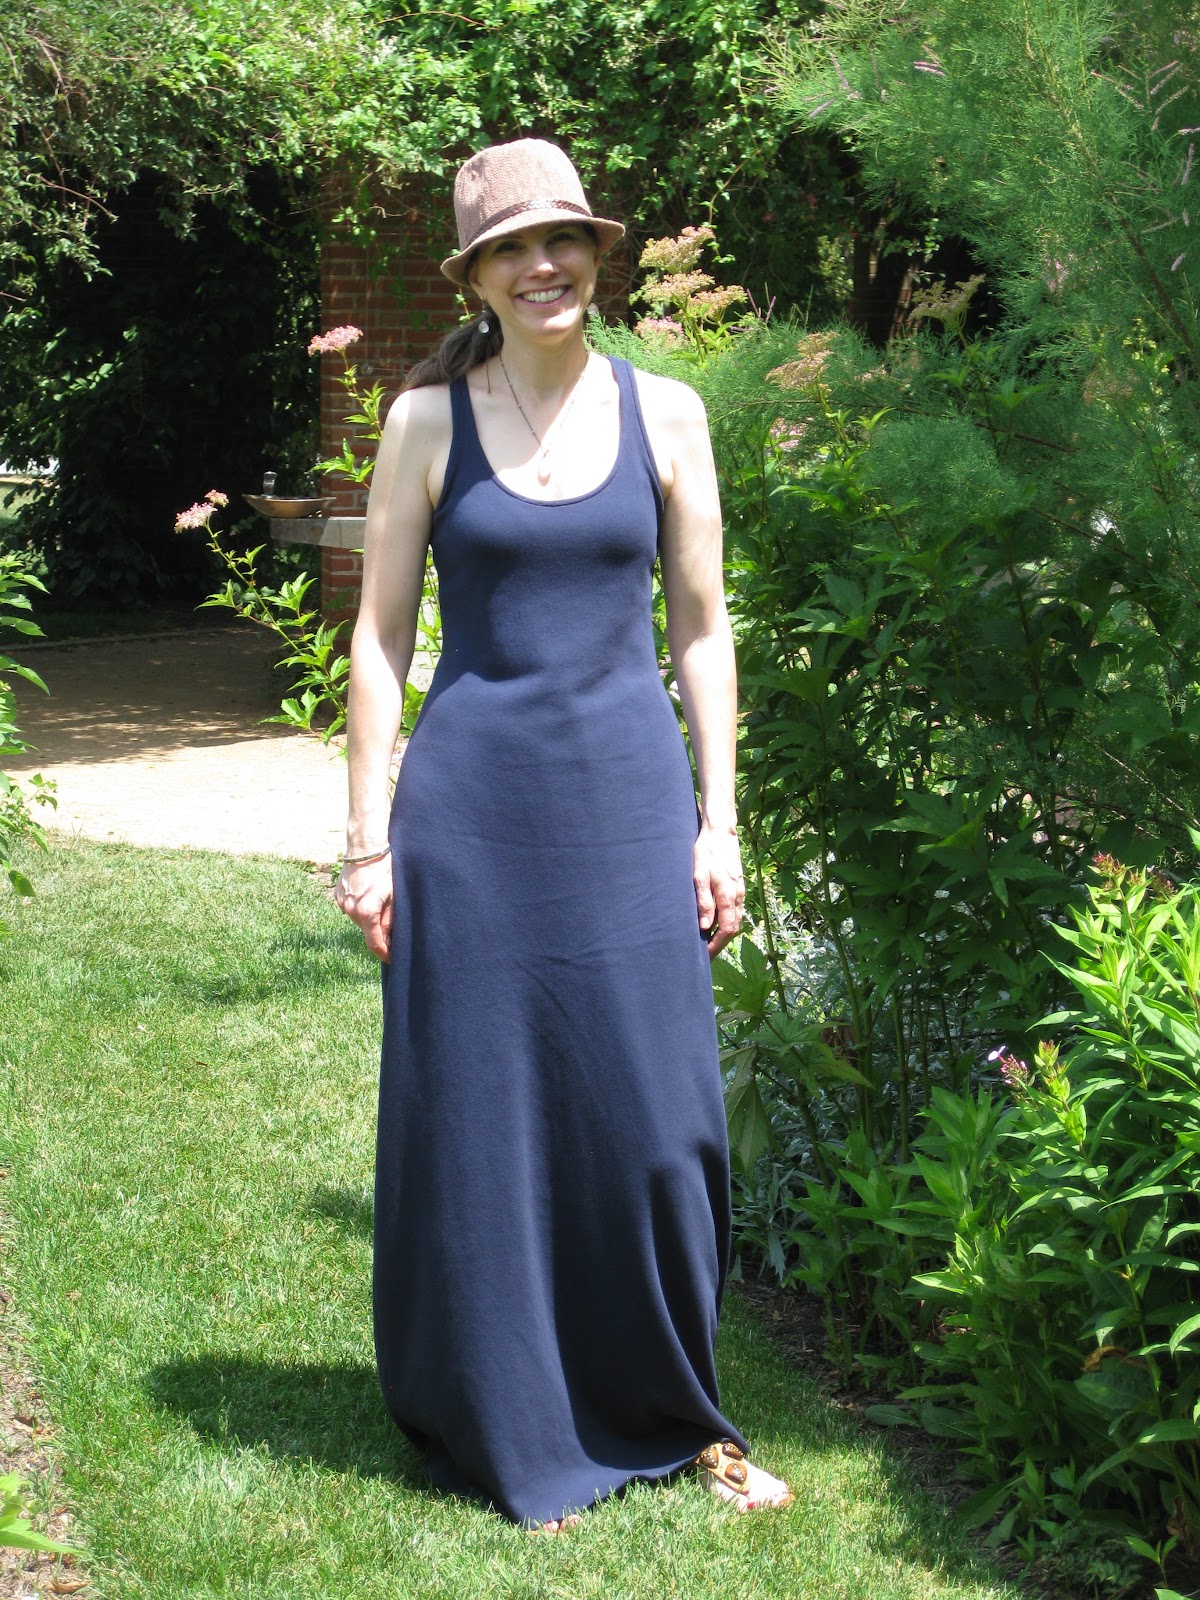
This is how I actually wore it today, with a little blazer, a hat and some flat sandals.  But I wanted you to see the actual tank part of it, so I took my blazer off:


As Hubby took these pictures, he kept saying, "Pull your stomach in!"  Sadly, I already was before he even said that.

I have a lot to say about this dress, so let's dive right in!  If you don't sew, you might want to skip this part.  Or even if you do sew.

The pattern I used was the Mission Maxi by Jamie Christina.  This is the only pattern of hers I've used, so I don't feel like I can really comment on the quality of the pattern, since this is a pretty simple and straightforward garment.  The fabric I used was 100% organic cotton interlock knit from Fabric.com, and it was the source of most of my troubles, I've decided.

Remember how I said I ordered a bunch of knits without really knowing what they were, and my red polka dots ended up being a thinner fabric than I was expecting?  Well this one was quite a bit heavier than I was expecting, but I decided that might not be a bad thing for such a body-conscious garment.  And it was cheap, so I wasn't going to be too heartbroken if it didn't work out.

When I traced my pattern pieces, I followed the lines for the size 4 above the waist, and graded out to an 8 at my standard 10" hip drop.  My actual hip size according to the pattern envelope would have been more like a 12, but I measured the pieces at that 10" drop line on the size 8 and came up with 40".  My actual hip is 39", and I felt this dress should skim the body pretty closely, so I stuck with the size 8.  I think this was exactly the right adjustment for me.  The only other adjustment I might do in the future is to take a little bit off the straps so it's not quite so low-cut.

front view (after wearing it all day)

back view, slightly racer-back

I decided that I'd try using my regular sewing machine for this one, and even went so far as to get out my ball-point needles and walking foot.  I did several seam samples before starting, and found that the "stretch stitch" on my Kenmore (which seams to be a triple stitch) does produce a firm yet stretchy stitch.  When used with the regular straight stitch foot, the top layer of fabric did end up being longer, but the walking foot elimated this problem.  Unfortunately, it also really aggravated me:  it's very clunky and loud.

I also learned that the walking foot really doesn't work if you don't have the fabric extending all the way to its edge.  I was trying to do a very narrow seam when I applied the binding to the neck and armholes, but the walking foot just wasn't letting me, so I ended up having to make those seams wider.

By the time I got to doing the side seams, I'd had about all I could take of the walking foot, so I did those on the serger.  SO much faster and easier, even taking into account that I re-threaded the left needle to black!

Disaster struck when I tried to fold the bindings to the back and topstitch them.  No matter what I tried (and I tried a lot:  stretch stitch, straight stitch, zigzag) the bindings were getting very stretched out and wavy.  Each time I tried something new, I tried it out first on a scrap; when it seemed like it would work, I tried it on my dress and got a wavy mess which I then had to pick out!  Finally the binding on the right armhole was so stretched out that I stopped sewing and threw the whole dress into the washer and dryer to get it back to its original shape.  A bonus was that it also shrunk about 3" in length, so I didn't have to cut any fabric off the bottom like I originally thought I'd have to.  (And yes, I did pre-wash and dry my fabric!)

After all that, I just wanted to finish the darn thing, so I hand-stitched the bindings to the back and washed my hands of the whole business.


But I was really puzzled about why this happened, so I did some research and also whined about it to Alicia, and my conclusion (and hers) is that interlock is a difficult fabric to work with and behaves completely differently from jersey.

One of the little tidbits I learned in my quest for understanding is that interlock has a fair amount of horizontal stretch, but not much vertical stretch.  Well . . . I beg to differ on that one.  My dress that was exactly the right length so you could see my cute sandals continued to grow longer as we walked around the botanical garden today, until it was actually dragging on the ground!  I'll be very interested to see what happens in the second wash and dry cycle.

I have a second piece of this interlock, in kelly green, and I've already cut it into an identical dress.  My plan this time is to do the entire thing on the serger, attaching the bindings in the same way they're done on the Renfrew top.  So stay tuned for Episode 3 of:

Knit Adventures!

Friday, June 22, 2012

Birds of a feather

Yep, here we are, Alicia and me, in the remnant room at Vogue Fabrics in Evanston last Friday:


I swear she bought more fabric than I did!  I don't know how I ended up with so many bags!

A funny thing happened while we were there.  I ended up getting there earlier than the time we'd agreed to meet, so I spent a little time looking through the remnants while I waited.  There was one fabric I kept coming back to . . .   Later, when we were checking out the remnants together, Alicia went for the same fabric I'd been looking at!

There were two 1.5 yard pieces, so we decided to each get one and do a co-blog project.  Our mental wheels were turning as we ate lunch later, thinking of different ways we could use this lovely double-border print:


I finally decided a few days later that I'd like to make a loose top, and settled on the Portfolio pattern by Lisette.  I was hoping to be able to fit the tunic length into the print, but sadly it's too long, so I'll be going with the blouse length.  I'm hoping I can lengthen it a smidge, but I'm really set on having the navy and aqua flowers at the bottom, transitioning into the red flowers at the shoulder, so I'm not sure I'll be able to.

Alicia plans on writing a post today too, about her plans for her piece of fabric.  So hop on over there to see!  Hers is going to be much different!

Wednesday, June 20, 2012

Uh oh!

I got some new toys today!


It's been a while since I've bought an entire collection of polishes, but I've been waiting for this collection for months.  I've seen this called variously as a fall and as a summer collection.  For me, these colors are wearable all year long.

Now, which color to start with?

Tuesday, June 19, 2012

More Starmore

A few weeks ago, when I wrote about starting my second Alice Starmore sweater, Erin left a comment telling me about an interesting book on the subject.  I placed it on hold at the library the same day, and was able to pick it up last week.  Thanks, Erin!

Sweater Quest by Adrienne Martini

In Sweater Quest, writer and knitter Adrienne Martini recounts her experience in knitting Alice Starmore's design Mary Tudor.  I was especially interested in this because I knit this very design almost two years ago - it's the sweater Linda and I did for our first knit-along.

Mary Tudor cardigan

Martini not only relates her experience with knitting this design, but also discusses the controversy surrounding Alice Starmore and her fierce protection of her intellectual property, which came to a head in the early 2000s.  I was only peripherally aware of the situation at the time, despite working in a yarn shop; but I do remember hearing whispered rumors, so it was nice to finally have them explained!

close-up

My current Starmore undertaking is coming along slowly.  I'm a little more than half way through the bottom border.  Since starting on the first of June, I've been averaging working on it about 3 times a week, knitting about 3 rows at each sitting.

Queen Anne's Lace pullover

The leaf design of the border is becoming apparent now:

Queen Anne's Lace rib and border pattern

I've been holding the grey/white mix in my left (dominant) hand and the contrast yarns in my right hand.  When working stranded knitting with one color in each hand, it's common for one hand to be dominant*, which causes that color to come to the forefront.  I'm going to have to decide if I want to continue this way, so that my work reads as a grey sweater with red/blue/purple designs, or change hands to get a red/blue/purple sweater with grey designs.  I'd originally thought I wanted the grey to be dominant, but now I'm not so sure!

my Starmore kit

* I learned this last year from Tasha and her Vintage Knitting College - thanks, Tasha!

Monday, June 18, 2012

Call me Bubbles! Everybody does!

After months of threatening to make a Renfrew tee, I've finally done it!


Two weeks ago, I made a big order of knits in preparation for finally getting to this pattern.  I'll admit I was a little fast and loose with my clicking on Fabric.com; I didn't fully read each item description, and consequently some of the fabrics were a surprise when I opened the box.

Like this one.  I'd thought the polka dots were going to be about a quarter of this size, and my first reaction was that, like Bubbles DeVere, I'd probably rather go naked than wear this print.  So I decided, what the heck - I'll use it for my first go of the pattern.  No great loss if it doesn't work out!

Imagine my surprise when I finished sewing it up and quite liked it!  I actually think it will be darned cute with jeans, although I can't say for sure because I'm in my house-cleaning grubbies today (because that's what I really ought to be doing.)

This top was so fast and easy to make.  I traced the pattern yesterday, which took less than a half hour, and then later in the day spent another 20 minutes or so cutting out the fabric.  I sewed the entire top this morning in less than an hour and a half.  I did skip a few steps though . . . I didn't have any twill tape, and decided not to bother with it since I'd thought this one was probably destined to be a sleep tee.  And I didn't topstitch the neckband down because I like how it looks without the topstitching, so I'm going to see how it wears (and washes) this way.


I sewed the entire thing on my serger.  It was so much easier than I was expecting it to be.  I did 2 little test seams on scrap fabric, and everything seemed fine, so I just went ahead and  got started.  I didn't even change my needles out to ball points!  Although in truth, they are probably ball points by now because I haven't changed the needles once since I got the serger!

I made the size 6 top with no adjustments - Sewaholic's size 6 matches my measurements exactly!  I chose the neckline of View A with the sleeves of View B.  The fit on this top is close, but not tight - just right in my opinion.  This fabric ended up being thinner than is recommended; it's a rayon/polyester blend, and quite soft and drapey.  I was worried that might cause me problems, but it really didn't!

I'm so happy with my first experience sewing knits.  I was nervous because so many people say it's difficult, but I found it to be quite easy.  I'm hoping it's not just beginner's luck!  I can't wait to make more of these.

I'm also happy with my first experience with Sewaholic patterns.  I really like Tasia's layout and design, and the instructions were clear and concise.

Champagne!  Champagne for everyone!

Sunday, June 17, 2012

Saturday Brunch

Yesterday we went out with some friends for brunch, and I wore the new Museum Tunic (number 2) that I had made on Friday afternoon:


Remember when I made the first one, and said that the "dusky lavender" colorway of the fabric had been my first choice, but it was sold out?  Well, the very next day I got an email from Hawthorne Threads that it was back in stock, so I quickly ordered enough to make a second dress.

When I received it though, I was awfully disappointed.  First off, as I'm sure you've noticed by now, it's not lavender at all!  It's more of a deep taupe.  But the  most disappointing thing was that this one is not printed on Swiss dot like the yellow version.  I was complaining about it to Andrea after I got it, and she told me she'd heard that only the first run of this fabric (way back in 2009) got printed on Swiss dot, and after that ran out, reprints were done on voile.

It took me about a week to get over my disappointment and make the dress.  And it's OK.  I don't like it as much as the yellow version, but I don't hate it either.  And you have have noticed that there's plenty of room to expand in the tummy region of this dress, so it was a good one to wear to brunch!

I also wore a whole lot of other stuff I'd made.  I carried my phone and cash in my Vanilla Clutch (which gets a lot of use), and wore several pieces of jewelry I've made over the years.  I decided to share those too.


These are my Droplet Rings.  They're a set of three stacking rings with formed discs soldered on.  I really love these because they can be worn in many different combinations.  And you can't tell here because the light was dim when I took these pictures, but they're quite bright and shiny.


And from left to right are some simple earrings made from chain and blue chalcedony; a set of simple bangles made from silver wire formed into a circle and soldered closed - one of which has a couple of charms dangling off; and finally, one of my all-time favorite me-made pieces of jewelry, a PMC and CZ pendant.  I love this one because it has a very nice heft and is feminine and vintage looking.  I made it by making a mold from a vintage button, and then using that mold to form the clay.

I've said before that my day-to-day dress is pretty plain and unadorned, so it was nice to put on a bunch of pretty things and go out with friends, and even nicer knowing that I made most of them!

Saturday, June 16, 2012

Nook cover, v.3

Remember when I made this Nook cover for my mom?  We were both excited about it, because we thought it was so pretty.  But it didn't fit!  I hadn't realized there were different sizes of Nooks, so I made it to the dimensions of the first one that came up in my google search.

Mom told me the actual dimensions of her Nook, and I tried it again with the same fabrics.  And again I failed - too small!  I didn't even bother to send the second one when we figured out the Nook wouldn't fit inside.

But I promised, so a week or two ago I purchased this pattern from Craftsy, and this week I headed to the fabric store to get some new fabric to make a fresh start.  And on Thursday afternoon, I made this:


I chose this combination of fabric because my mom's favorite color is blue, and mine is yellow; and we both love flowers.  So I'm hoping she'll feel like she has a little piece of me with her.  I really hope this one fits because I think it's so pretty!

The yellow triangles work like photo corners to hold the reader.  The loop is made from a hair elastic!  And there's a nice big pocket on the left inside to hold papers and such.  Inside the layers is fusible fleece, which I'd never used before but now I love!  It gives the cover very nice padding, and doesn't shift around while you sew because it's fused on.

When I first downloaded the pattern, I felt kind of daunted, because it's 23 pages long.  But a lot of that is pattern pieces, which aren't necessary if you have a rotary cutter and mat.  It took me about as long to cut out all my pieces (fabric, interfacing and fusible fleece) as it did to sew the cover together.  I finished the whole thing in about 2 hours.  But remember - I iron and re-iron, and spend an inordinate amount of time admiring my work as I sew, so you could probably make it faster! 

The instructions were clear, and the pattern can be used for many different sizes of readers, iPads, etc. either in the one-pocket version I made, or with two smaller pockets. 

Despite my slow start, I really enjoyed making this cover!

Friday, June 15, 2012

Almost-toile Voile

On Tuesday, I shirked most of my duties and instead made this blouse:


This is the Lisette Souvenir Blouse, in a cotton voile print that is very like toile, except that there are no people.  I bought this piece of fabric a few months ago from Vogue, intending it to be for the muslin of this blouse - which technically, it is.  But I ended up really loving this print!  So I'm glad there were no unhappy surprises in the construction of this piece.

I cut a straight size 10, and only made one modification.  Rather than doing a deep hem like the pattern calls for, I did a tiny hem to make it longer.  Do you see where I'm going with this?  Yes, it covers up the wavy zipper of my Clover pants!  But to accomodate my hips, I ended up having to make side vents.  I just unpicked each side seam 3"  and then stitched 1/4" from the fold:


I love this blouse, but there's one tiny detail that I'm not too happy with.  On the front neckline, there's a part of the design that makes it look like I made a mistake in stitching!   See if you can spot it:


I swear, it's the print of the fabric and not shoddy stitching!

This pattern wasn't too difficult; I'd say the whole thing took me about 4.5 hours, and that includes tracing the pattern and cutting the fabric.  The construction of the sleeves and yokes is interesting, and I'll admit the directions didn't make a whole lot of sense to me.  But I was able to figure out how it was supposed to go together and just ignore the instructions.

Yesterday I wore it to run errands and do chores around the house, pairing it with the Clovers for their test run.  I'm pretty happy with the fit of the pants, and they didn't loosen up (read:  get baggy) as much as I'd suspected they might.  And with this top to cover up the zipper, I felt pretty darned cute, even though allergies are keeping me from wearing any makeup these days.


Are any of you thinking of making this top?  When the new spring patterns from Lisette came out, I was a little underwhelmed, but they've really grown on me! 

Thursday, June 14, 2012

Long time, no stamp.

Let's fix that, shall we?


I wanted to get another day or two of wear from the polish I put on the other day, Zoya Farah.  So this morning I stamped it with Essie No More Film and Bundle Monster plate BM204.  I really like the brocade look of this image, and I think the blue-violet of the Essie looks great against the yellow-beige of the Zoya.

It's been quite a while since I stamped my nails, but I might just have to start it up again!

Wednesday, June 13, 2012

A New Endeavor

Whew!  I feel like I've been running around like a chicken with its head cut off!  So much to do, so little time - which is why this post is a few days later than I wanted it to be.

I've started yet another project!  This one has been in the works for quite a while, and I can finally show it to you now.

Do you know Evelyn over at Project Stash?  She and I have been corresponding for a while, and kicking around ideas about how we could work together.  And it turns out we had very complimentary goals:  she wanted to start designing knitting patterns, and I wanted to get into doing technical editing (of knitting patterns)!  A match made in heaven!

Just before I left for Germany, Evelyn let me know that when I got back there would be some patterns in my inbox to edit.  In the week following my return, we sent many emails back and forth refining the three patterns she sent me, and on Sunday, the first of these went live on her website.  Here's the picture:


Evelyn has also had a redesign of her blog to go along with her patterns;  all the graphics were done by her very talented niece!  And how lovely is that model?  It's her daughter!

I had so much fun editing these patterns for Evelyn, and it confirmed my idea that technical editing is a direction I'd like to go in the future.  I do a fair amount of editing for family and friends of scientific and medical papers, and I enjoy it.  But knitting patterns!  SO much more fun!!  And I understand ALL the words!

If you'd like to check out Evelyn's pattern, head on over to her blog.  The button in the right sidebar will direct you to a free download of this pattern.  And stay tuned for more patterns from Evelyn!

And if you want anything edited, give me a jingle!


Monday, June 11, 2012

Off to run errands.

In my new dress!


I think it looks a lot better on my body than on the hanger!  Can't wait to make the purple one!

Sunday, June 10, 2012

Clovers, finished

I finished my Clovers this afternoon, and I'm pretty happy with them overall, but there were a few hitches.

Remember how I was so proud of myself yesterday that I quit sewing before I got over-tired?  Well I guess I didn't quit soon enough, because this morning I discovered that I had sewn the wrong seam on the waistband facing.  Of course, I didn't realize this until I had attached the facing to the waistband and then severely trimmed the seam allowances.  I did wonder why I had to stretch the fabric so much as I was sewing.  And then I took a good look at it and realized it was all backwards.  So I had to pick it all out and redo it.  Sigh . . .

I also spent a lot of time on the zipper.  I hand basted it in to make sure everything was lined up.  But I always have a lot of trouble with the bottom section of invisible zippers, where the pull is when you're sewing.  I can never get my stitching as close to the zipper teeth in that section as I need to.  I ended up going back over it by hand to try to fix it, and it is a little better, but it still gapes at the bottom:


Does anybody have any tips for avoiding this?

The biggest problem with the pants is that the zipper is wavy, and I really have no idea how to fix this.  Was I supposed to put some organza lining in the zipper section to counteract the stretchiness of the fabric?  Look:


 That is the fabric bulging out, not my body!  And it's frustrating, because the other hip (the one I altered) is so smooth!  Any advice anybody has for this would be greatly appreciated!

My immediate solution is to wear the pants with a top that's a little longer.  This one looks good with the pants (and these sandals!), but it's not quite long enough to hide the "wave" :


And here they are from the back:


I think overall they're a good fit, and the alterations I made to the pattern were spot on.  I can live with the little bit of bagginess in the back of the legs for now (until I actually read Pants for Real People that I made Hubby buy me months ago).  I just need to figure out how to deal with the zipper issue.

For reference, I started with a size 8 and took in a couple inches at the center back and about a half inch at the right hip (my less full hip - thank you, Body Map!).  I did not alter the crotch curve in any way.  There is a little whiskering at the front crotch, so I may do that on future makes, but I want to wear these for a while and see how they loosen up before I make any more changes to the pattern.

And for fun, here are a couple Hubbyisms:

Before I even put them on after I'd finished, he said, "Those pants do not make your butt look big."  Good boy!

And once I had them on he said, "Those pants make your butt look amazing!"  Best boy!